
 Page Builder
  Widgets Bundle
  SiteOrigin CSS
  Installer
 Widget Areas
2 min read Updated
Vantage has widget areas for the sidebar, the header, the masthead and the footer. It adds a Shop area when WooCommerce is active. Go to AppearanceWidgets or AppearanceCustomizeWidgets to add widgets to them.
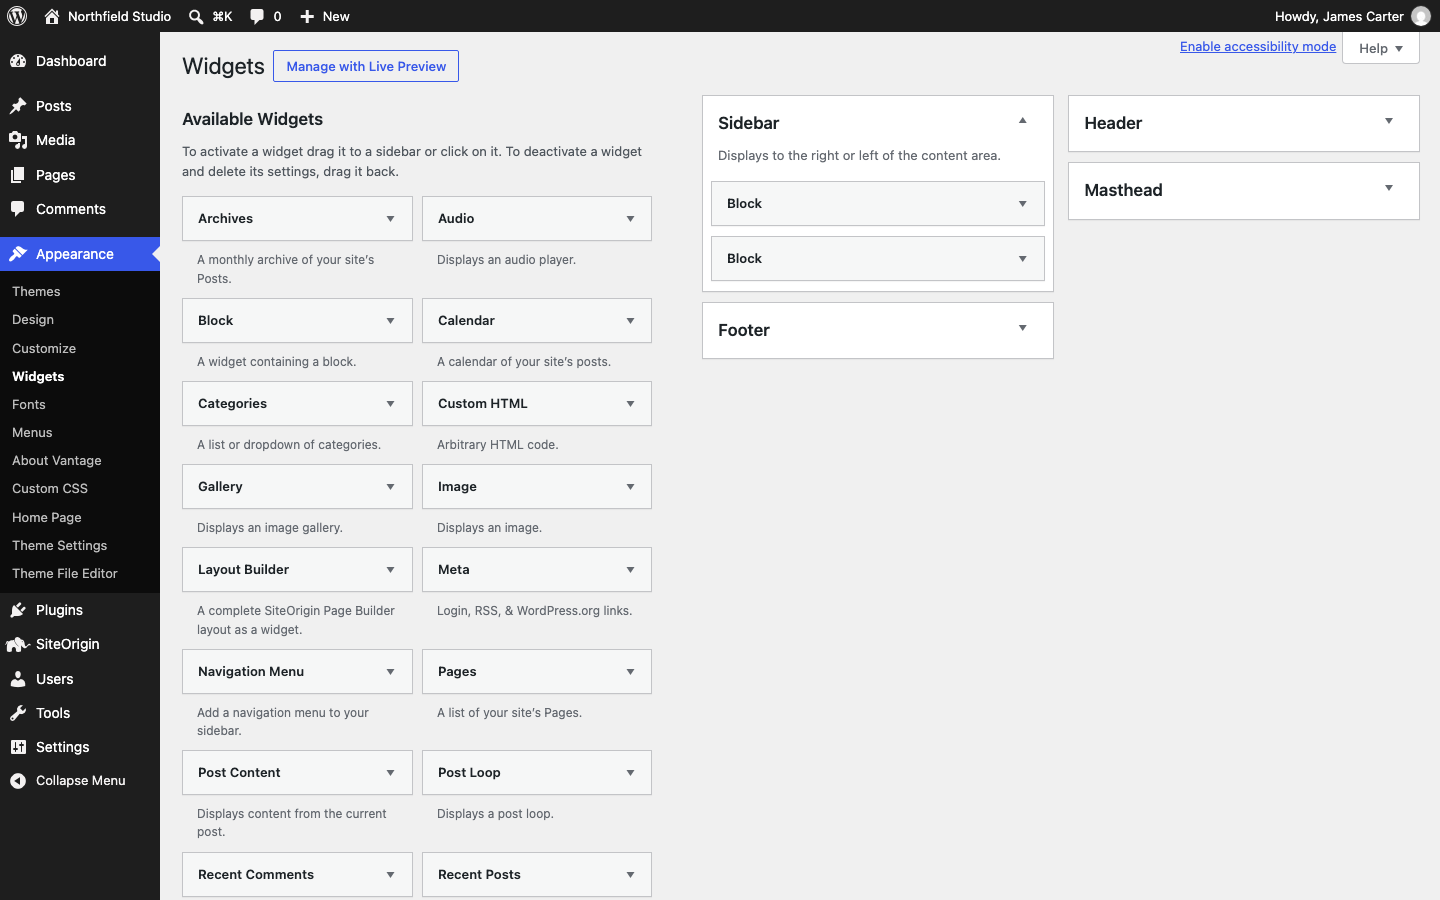
Add a Widget to a Widget Area
- Go to AppearanceWidgets.
- Find the widget you want in the list of available widgets.
- Drag it into a widget area, for example Header. You can also click the widget, choose the area and click Add Widget.
- Fill in the widget settings and click Save.
Widget Areas
Sidebar
Shows next to the content area, on the side you choose in the Sidebar Position setting. Widgets stack from top to bottom.
Shop
Shows on WooCommerce pages. This area is available only when WooCommerce is active. If it is empty, WooCommerce pages show the Sidebar widgets.
Header
Shows to the right of the logo. Widgets sit side by side, from left to right. The widgets replace the Header Text setting. The Logo In Menu masthead layout does not show this area.
Masthead
Replaces the logo and the Header widget area, so you control the whole header. The widgets share the width of the header equally. For example, four widgets get four columns of 25 percent. The Logo In Menu masthead layout does not show this area.
Footer
Shows below the content area. The widgets share the width equally. For example, four widgets get four columns of 25 percent.
Vantage sets the Masthead column widths when Responsive Layout is on. See Layout.
Related Settings
- To hide the footer widgets on one page, use Hide Footer Widgets in Page Settings.
- To change the colors of widget titles, see Widgets and Footer.
- To change the Header Text, see Logo.
Page Builder lets you add widgets to layouts in pages, posts and more. If you are new to Page Builder, watch the introduction.