One Page Website
If you’d like to build a one-page website, Corp and SiteOrigin Page Builder make the job easy.
Required Plugins
Go to Plugins and confirm that the following plugins are installed and activated.
SiteOrigin Page Builder
SiteOrigin Widgets Bundle
Add the Page
If you haven’t already created a page, go to PagesAdd New, create a new page and click on the Page Builder tab to get started. If you’d like this page to be your home page, go to SettingsReading to assign it as your static home page once saved.
Adjust Page Settings
Next, we’ll set up the page design to make it suitable for a full-width one-page website. Edit your page and scroll down to the Page Settings meta box and set the Page Layout to No Sidebar. Disable the Header Bottom Margin and Footer Top Margin settings as we’d like our first and last rows to be flush with the header and footer. For our demo, we’ve also set the Header Overlap to Enabled – Light Text and disabled the Footer Widgets as it suits our page design.
Insert a Page Builder Pre-Built Layout
In the Classic Editor, click on the Page Builder tab to switch to the Page Builder interface. In the Block Editor, insert a SiteOrigin Layout Block. In this example, we’ll be using a pre-built layout to get started. Click the Layouts button and then Prebuilt Layouts on the left. There you’ll find the One Pager layout. Select the layout and then use the Insert button (bottom right) followed by Replace current to insert the pre-built layout.
Once inserted you can edit each section of the pre-built layout and insert your own content. You can, of course, build your one-pager from scratch using Page Builder but for this tutorial, we’ll use a pre-built layout to speed things up.
Ready the Page for Navigation Using Row ID’s
Our page is now set up. Our next task is to ready the page for navigation links that will take the user to each section. We’ll do this by inserting an ID in each row. From the Page Builder interface, edit the first row by clicking the wrench icon on the right then Edit Row. Click the Attributes heading in the right column and locate the Row ID field at the top. Type a word to identify this row, for example, if your first row had information about the page/service/company you might enter about as the ID. Once inserted, click the Done button at the bottom right of the modal window and repeat this process for each row. Each ID should be unique.
Setup the Page Navigation
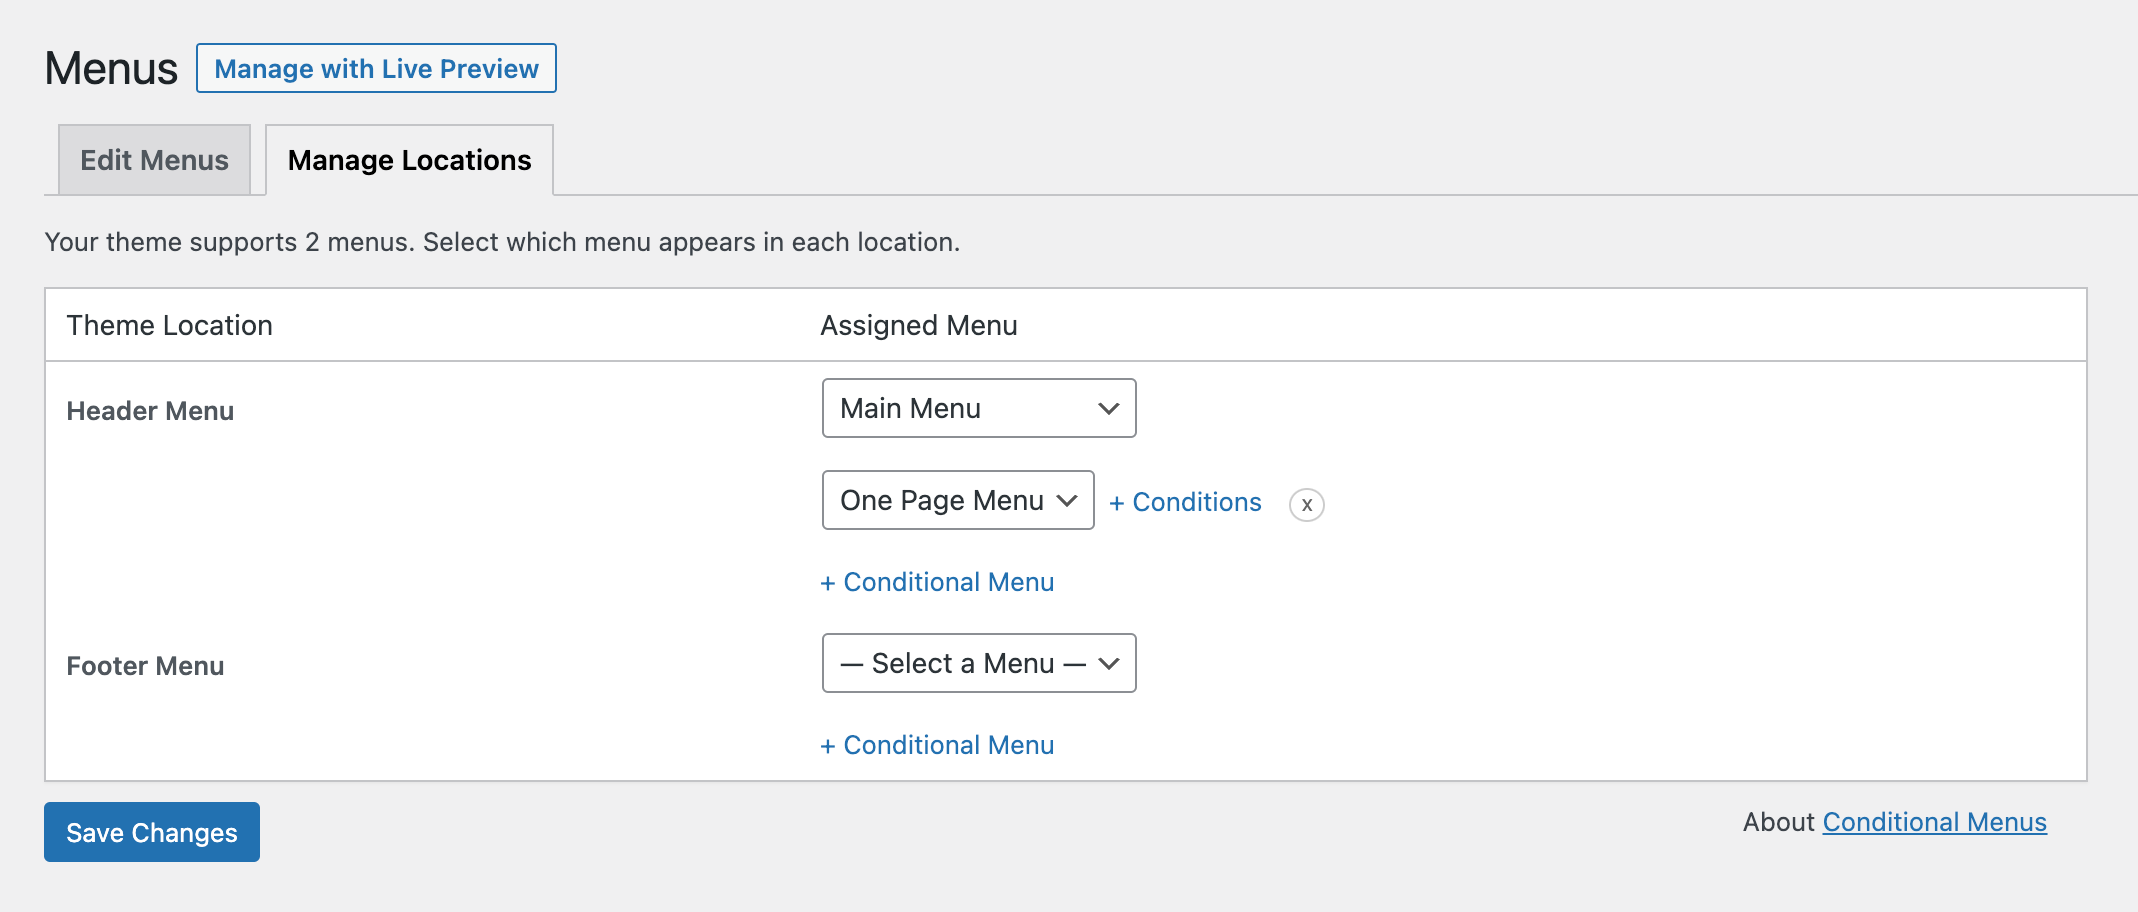
Go to AppearanceMenus. If you don’t yet have a custom menu created and assigned to Corp’s Header Menu location, click create a new menu, name your menu and use the checkbox at the bottom of the page to assign it to the theme’s Header Menu location.
To insert links to your page sections, click Custom Links in the left column, in the URL field, insert a hash followed by the name of your first row ID. For example, #about, assuming about was the name of your first ID. In the Link Text field, insert the menu item label, this is what users will see. Click Add to Menu. Repeat this process for all of your section IDs. Finally, click Save Menu.
In the above paragraph we used section links as follows:
#about
If other pages are present in your menu you can use the full URL:
http://yourdomain.com/#about
If you’d like to smooth scroll from a link outside of the main menu, simply add the following class to it:
corp-scroll
An example of this class added to a link:
<a href="#colophon" class="corp-scroll">Scroll to the footer</a>
Result
When scrolling the menu will highlight using the current menu item color, the section that’s being viewed. When a link is clicked on, the page will smooth scroll to that section.
Building a One-Pager Within a Larger Site – Different Menus
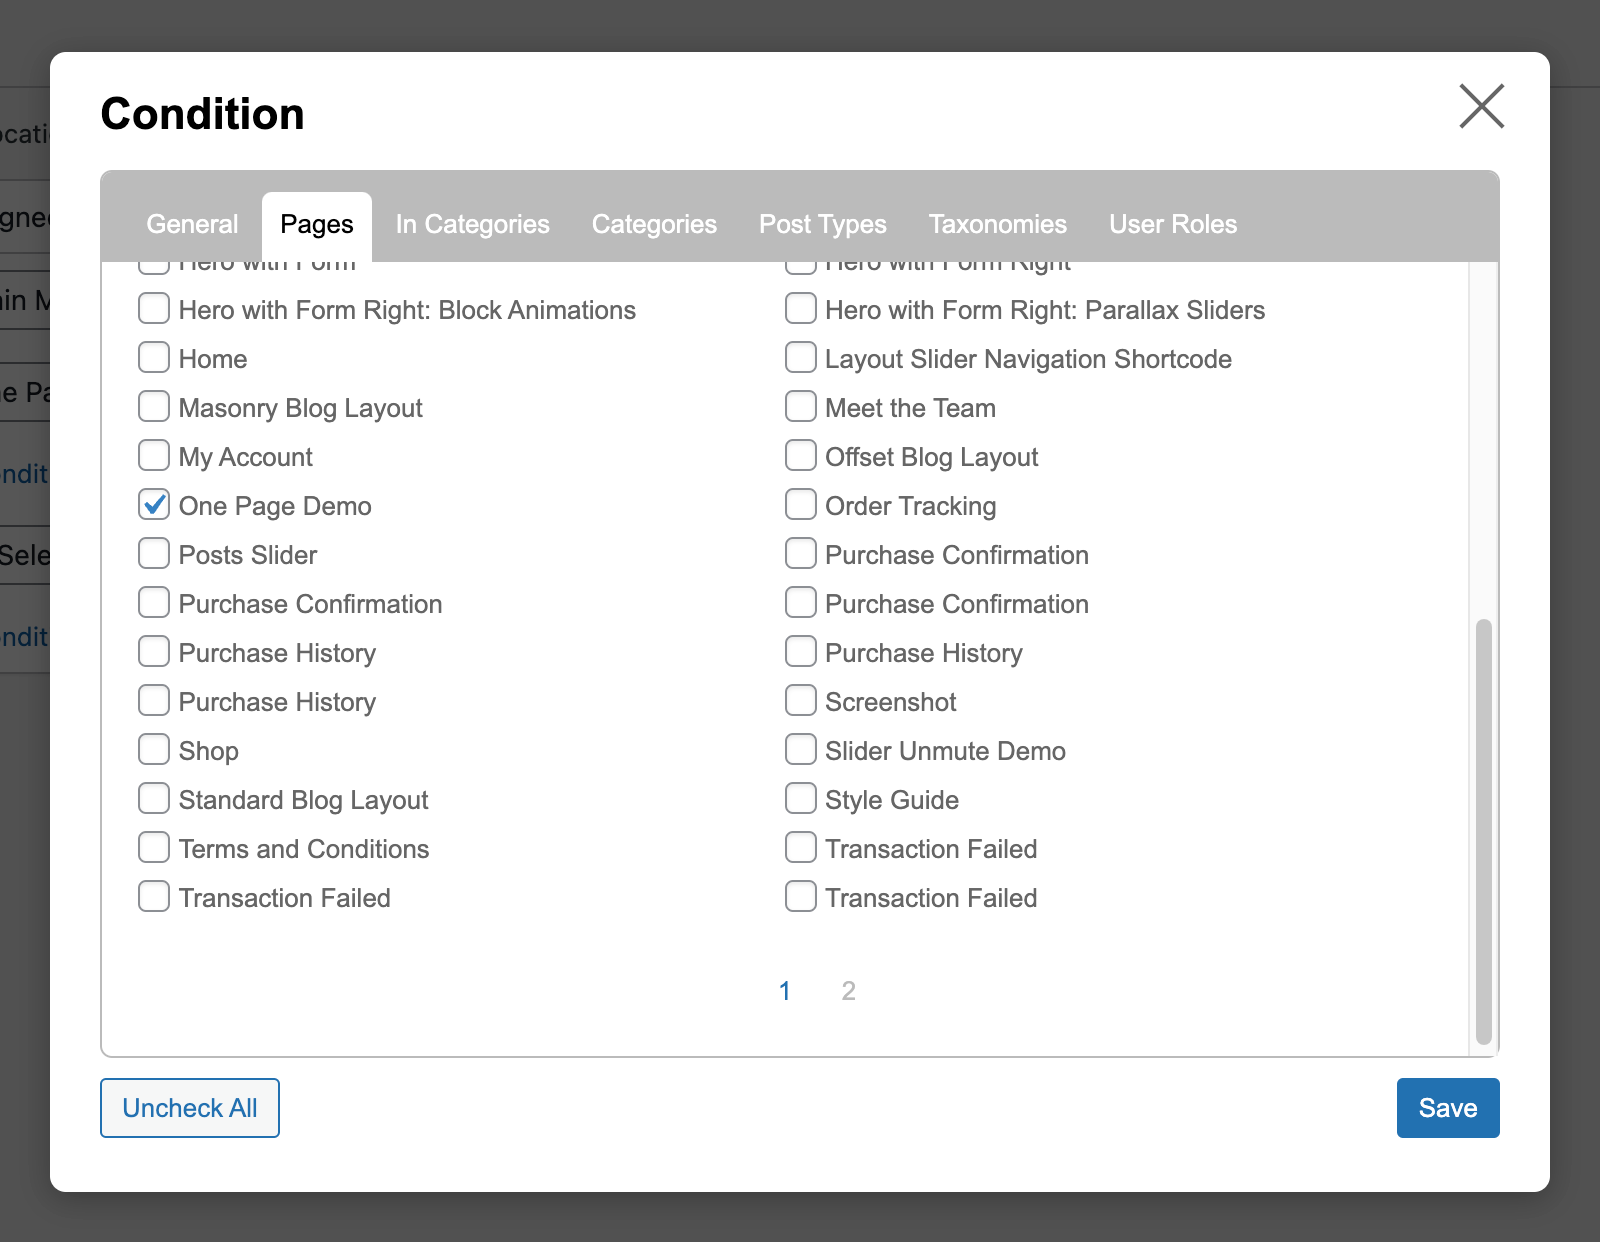
You might have noticed that our demo one-pager has a different menu to the rest of the demo site. We’ve done that using the plugin Conditional Menus. Once activated, navigate to AppearanceMenus and click Create New Menu to create a new menu for your one-pager. Once your menu is ready, click Save. Next, click the Manage Locations tab at the top of the page. Add a new conditional menu, select the menu you just created for your one pager. Finally, click the Conditions link to select your one page. By selecting a page condition for your page menu, you’ll ensure that your menu only displays on your one-pager.
Read the Blog Post
We’ve written a blog post on creating a one-pager with Corp. It’s similar to this documentation page but contains a few screenshots you might find useful. Read more on the blog.