
 Page Builder
  Widgets Bundle
  SiteOrigin CSS
  Installer
 Google Maps
8 min read Updated
The Google Maps Widget embeds a Google Map on your site. Add markers with info windows, show a route with directions, and change the map colors. You can show an interactive map or a static image.
Requirements
- SiteOrigin Widgets Bundle Plugin
- Optional: Page Builder by SiteOrigin Plugin
- A Google Maps API key. See API Key Setup below.
The Google Maps Widget is active by default. If it is not active, go to PluginsSiteOrigin Widgets and activate the SiteOrigin Google Maps Widget.
You can use the Google Maps Widget anywhere:
Page Builder: Add the widget to a Page Builder layout in the Classic Editor, or in the Page Builder Layout Block in the Block Editor.
Block Editor: Add the SiteOrigin Google Maps block. You will find it in the SiteOrigin block category.
Theme and Plugin Widget Areas: Add the widget to any theme or plugin widget area.
API Key Setup
The widget needs a Google Maps API key. You enter the key one time, in the global settings.
Create the Key
- Sign in to the Google Maps Platform console.
- Create a project, or select an existing one.
- Add a billing account to the project. Google requires billing for the Maps APIs.
- Enable the APIs from the list below.
- Create an API key.
- Restrict the key to your website address and to the APIs you enabled.
For more help, see Google’s guide: Use API Keys.
APIs to Enable
- Maps JavaScript API: Required for Interactive maps.
- Maps Static API: Required for Static image maps.
- Geocoding API: Converts the Map center and marker addresses to map positions.
- Places API: Suggests addresses while you type in the Map center and Place fields.
- Directions API: Required only if you use the Directions section.
Add the Key to Your Site
- Go to PluginsSiteOrigin Widgets.
- Find the Google Maps Widget and click Settings.
- Paste your key into the API key field.
- Click Save.
Settings
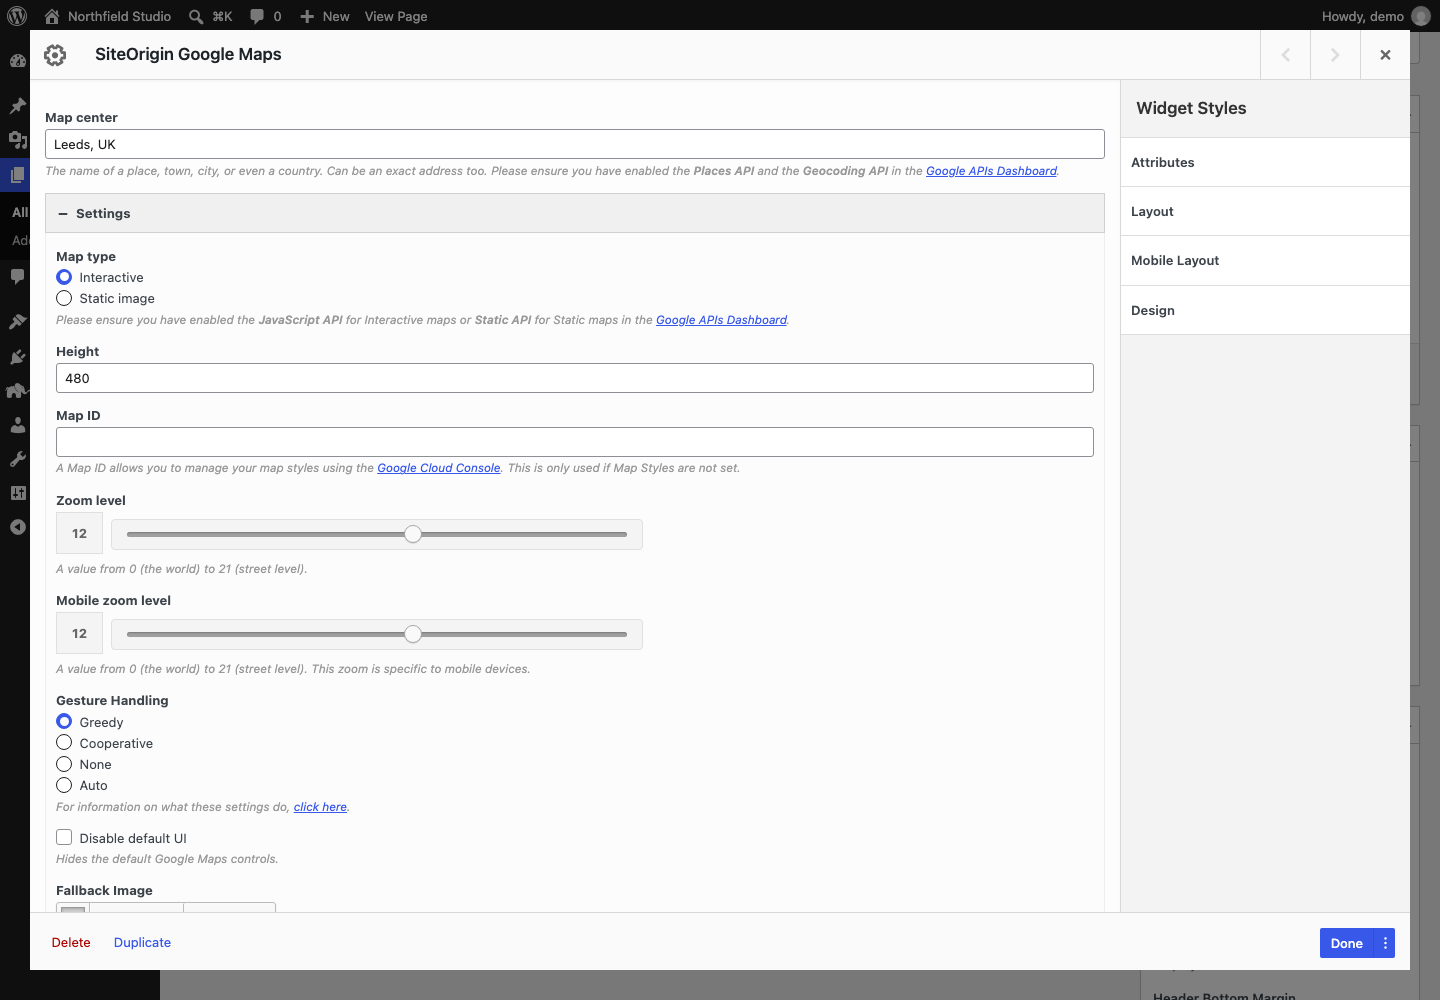
Map Center
Map center: The place the map centers on. Enter a place name, town, city, country or exact address. You can also enter coordinates, for example 53.7997,-1.5492. Address suggestions appear while you type.
Settings
Map type: Choose Interactive or Static image. Default: Interactive.
Width: The image width in pixels. Static image only. Default: 640.
Height: The map height in pixels. Default: 480. An Interactive map fills the width of its container.
Destination URL: Link the map image to a URL. Static image only.
Map ID: A Map ID from the Google Cloud Console. Use it to manage map styles in Google Cloud. The widget uses the Map ID only when the Styles section is set to Default or has no styles.
Open in a new window: Open the Destination URL in a new tab. Static image only. Default: off.
Zoom level: A value from 1 (the world) to 21 (street level). Default: 12.
Mobile zoom level: The zoom level on screens at or below the Responsive breakpoint. Interactive only. Default: 12.
Gesture Handling: How the map responds to scrolling and touch. Interactive only. Default: Greedy.
Disable default UI: Hide the Google Maps controls. Interactive only. Default: off.
Fallback Image: An image that shows when the widget detects a Google Maps API error, or when the static image fails to load. It does not cover every map error.
Fallback Image Size: The size of the fallback image.
The Gesture Handling options are:
- Greedy: One-finger and two-finger swipes pan the map.
- Cooperative: One finger scrolls the page. Two fingers pan the map. On a desktop, visitors hold Ctrl or ⌘ and scroll to zoom.
- None: Visitors cannot pan or zoom the map with gestures.
- Auto: Google chooses Cooperative or Greedy. The choice depends on whether the page can scroll.
For more detail, see Google’s Controlling Zoom and Pan guide.
Markers
Markers show points of interest on the map.
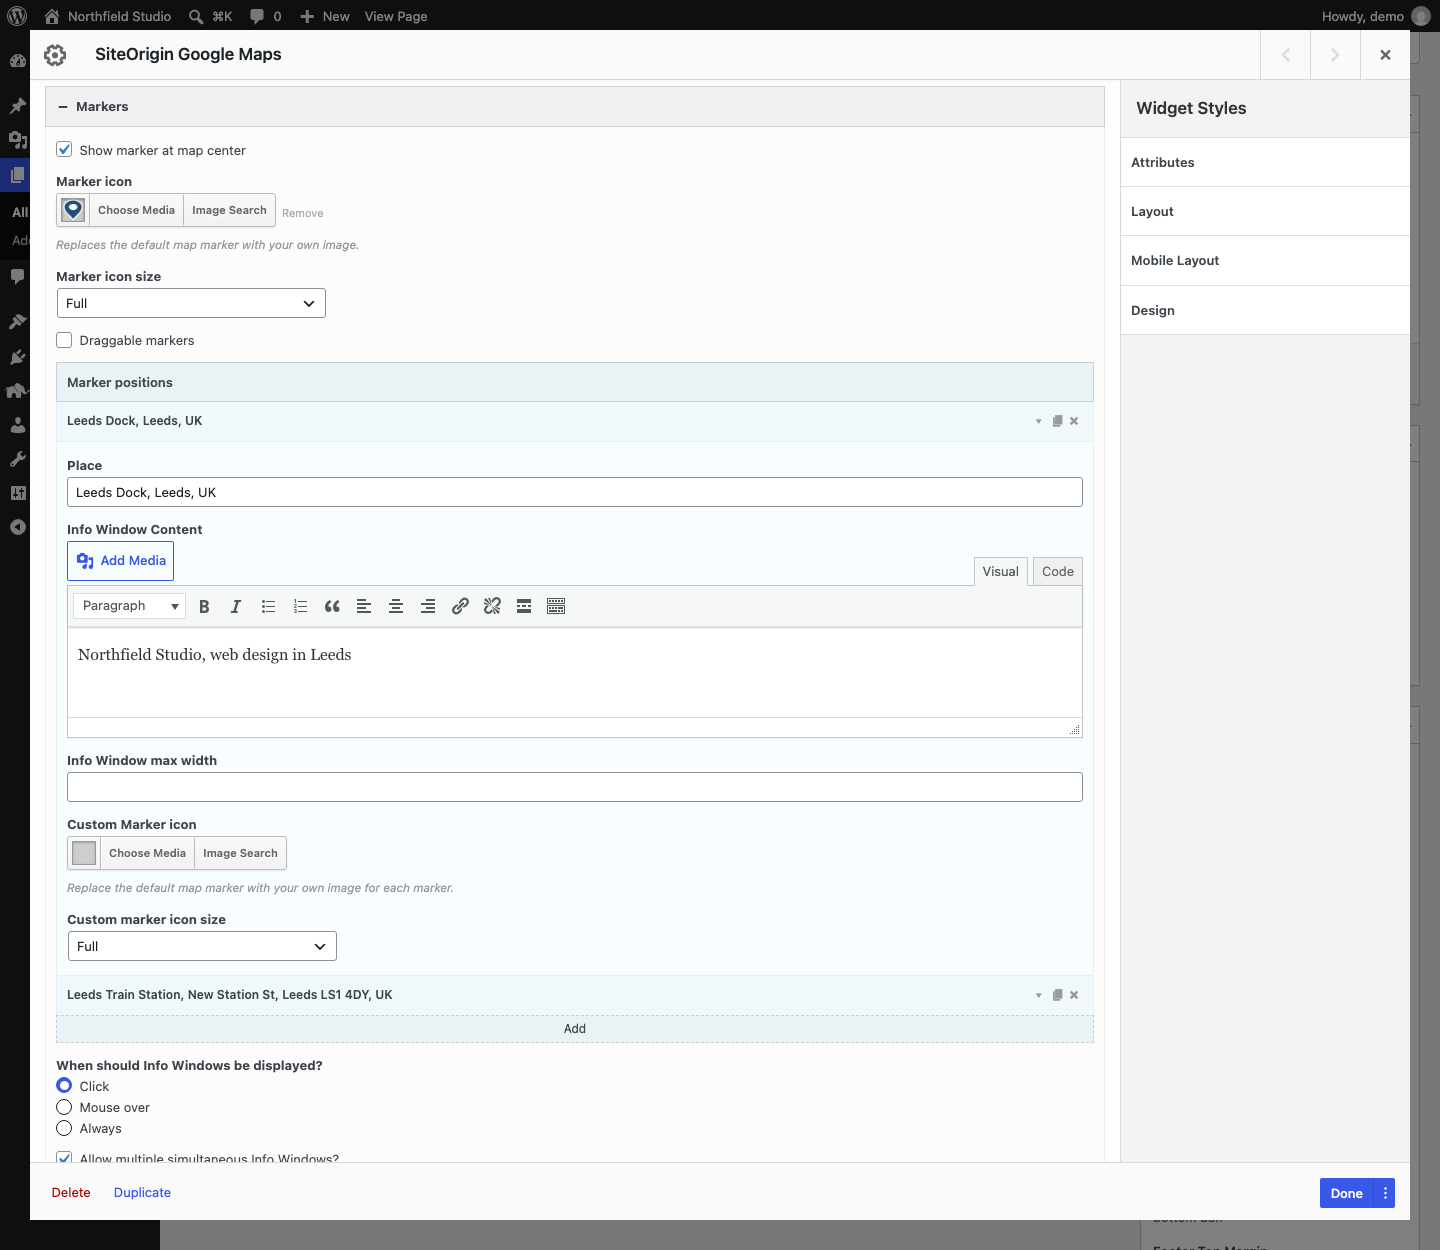
Show marker at map center: Show a marker at the Map center location. Default: on.
Marker icon: Replace the default Google marker with your own image.
Marker icon size: The image size of the Marker icon.
Draggable markers: Let visitors drag the markers. Interactive only. Default: off.
Marker positions: Click Add to add a marker. Add as many as you need.
When should Info Windows be displayed? Choose Click, Mouse over or Always. Default: Click.
Allow multiple simultaneous Info Windows? Let more than one info window stay open. The widget ignores this setting when Info Windows display Always. Default: on.
Each marker has these settings:
Place: The marker location. Enter an address, place name or coordinates.
Info Window Content: The text and media that show in the marker’s info window.
Info Window max width: The maximum info window width in pixels.
Custom Marker icon: Replace the marker image for this marker only.
Custom marker icon size: The image size of the Custom Marker icon.
A Static image map uses the Marker icon for all markers if you set one. If you don’t, it uses the default Google marker. It does not show info windows or Custom Marker icons.
Styles
Change the colors of map features, or hide them.
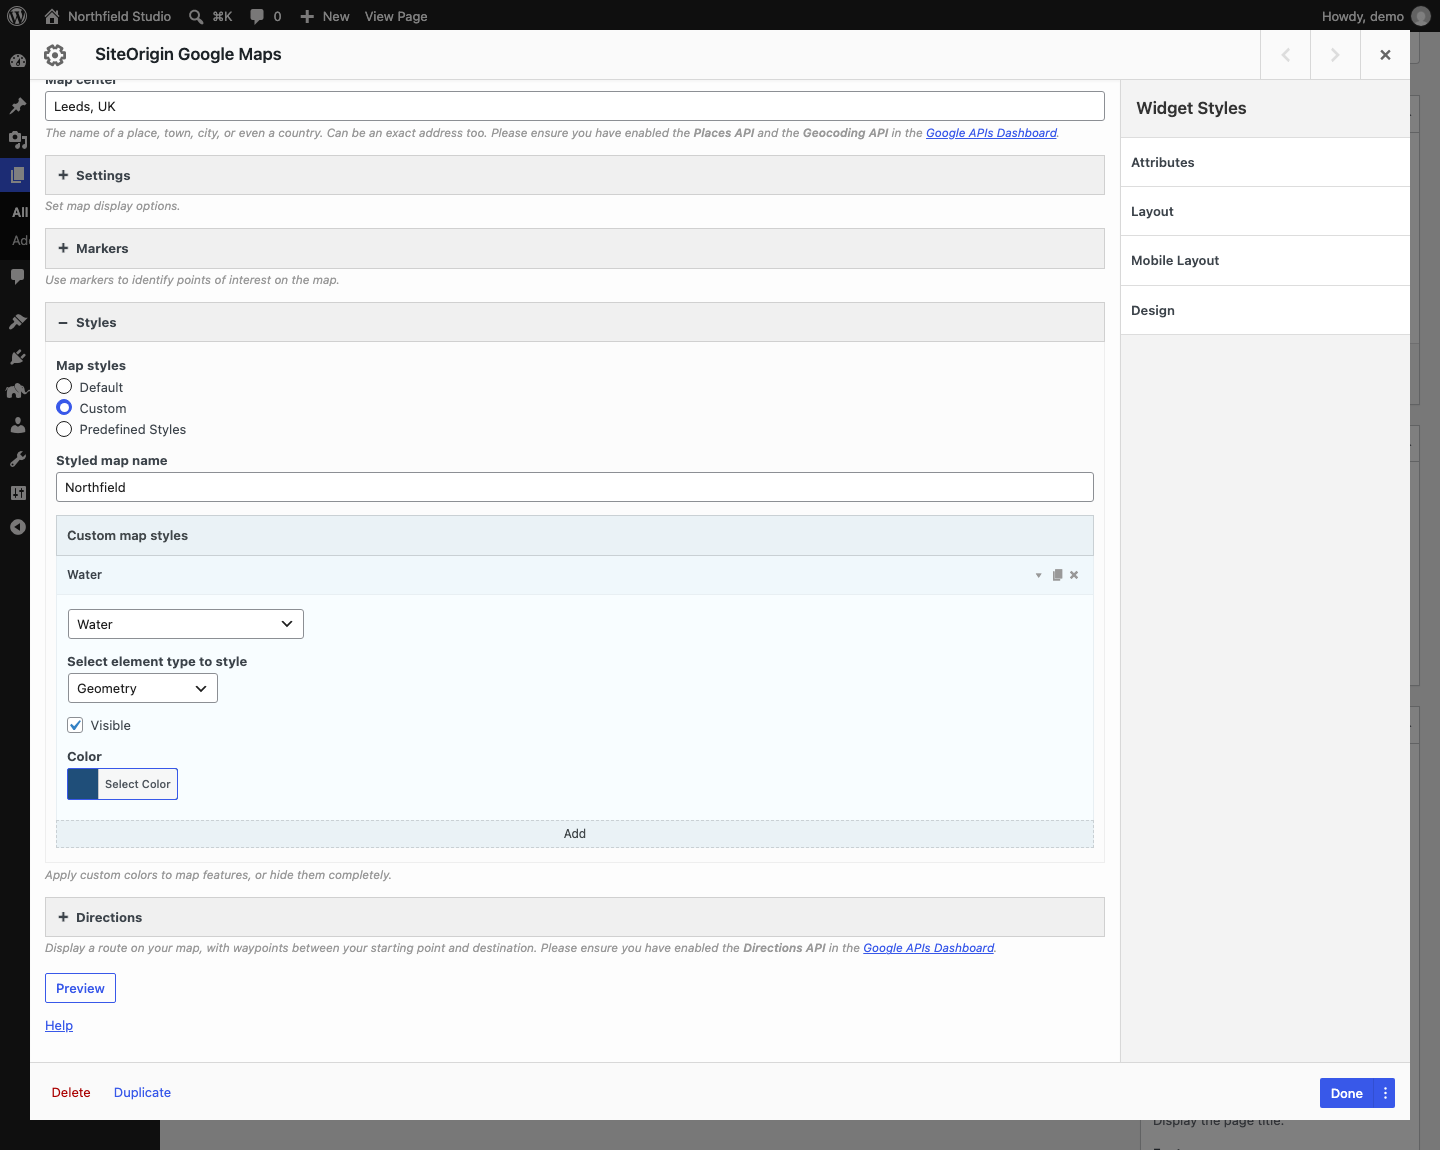
Map styles: Choose Default, Custom or Predefined Styles. Default: Default.
Styled map name: The name of your style. On Interactive maps, it shows in the map type control when that control is visible. If you leave it empty, the name is Custom Map. Shows for every option except Default.
Custom
Under Custom map styles, click Add to add a style. Each style has these settings:
Select map feature to style: Choose a feature, for example Water, Highways, Transit lines or Point of interest – Parks.
Select element type to style: Choose Geometry, Labels or All.
Visible: Show or hide the feature. Default: on.
Color: The feature color.
Predefined Styles
Raw JSON styles: Paste style JSON, for example from Snazzy Maps or the Google Maps Platform Styling Wizard.
Directions
Show a route on the map, with optional waypoints. The Directions section shows only when Map type is Interactive. You must enable the Directions API. The route shows only when you fill in both Starting point and Destination.
Starting point: The start address.
Destination: The end address.
Travel mode: Choose Driving, Walking, Bicycling or Transit. Default: Driving.
Avoid highways: Plan a route without highways. Default: off.
Avoid tolls: Plan a route without toll roads. Default: off.
Preserve viewport: Stop the map from zooming to fit the route. Use this when the map has other markers. Default: off.
Waypoints: Click Add to add a waypoint. Enter its Location. Keep Stopover on for a stop on the route. Turn it off to use the waypoint only as a route preference.
Optimize waypoints: Let Google reorder the waypoints to make the shortest route. Default: off.
Global Settings
Go to PluginsSiteOrigin Widgets, find the Google Maps Widget and click Settings. These settings apply to all maps on your site.
API key: Your Google Maps API key. Required. See API Key Setup.
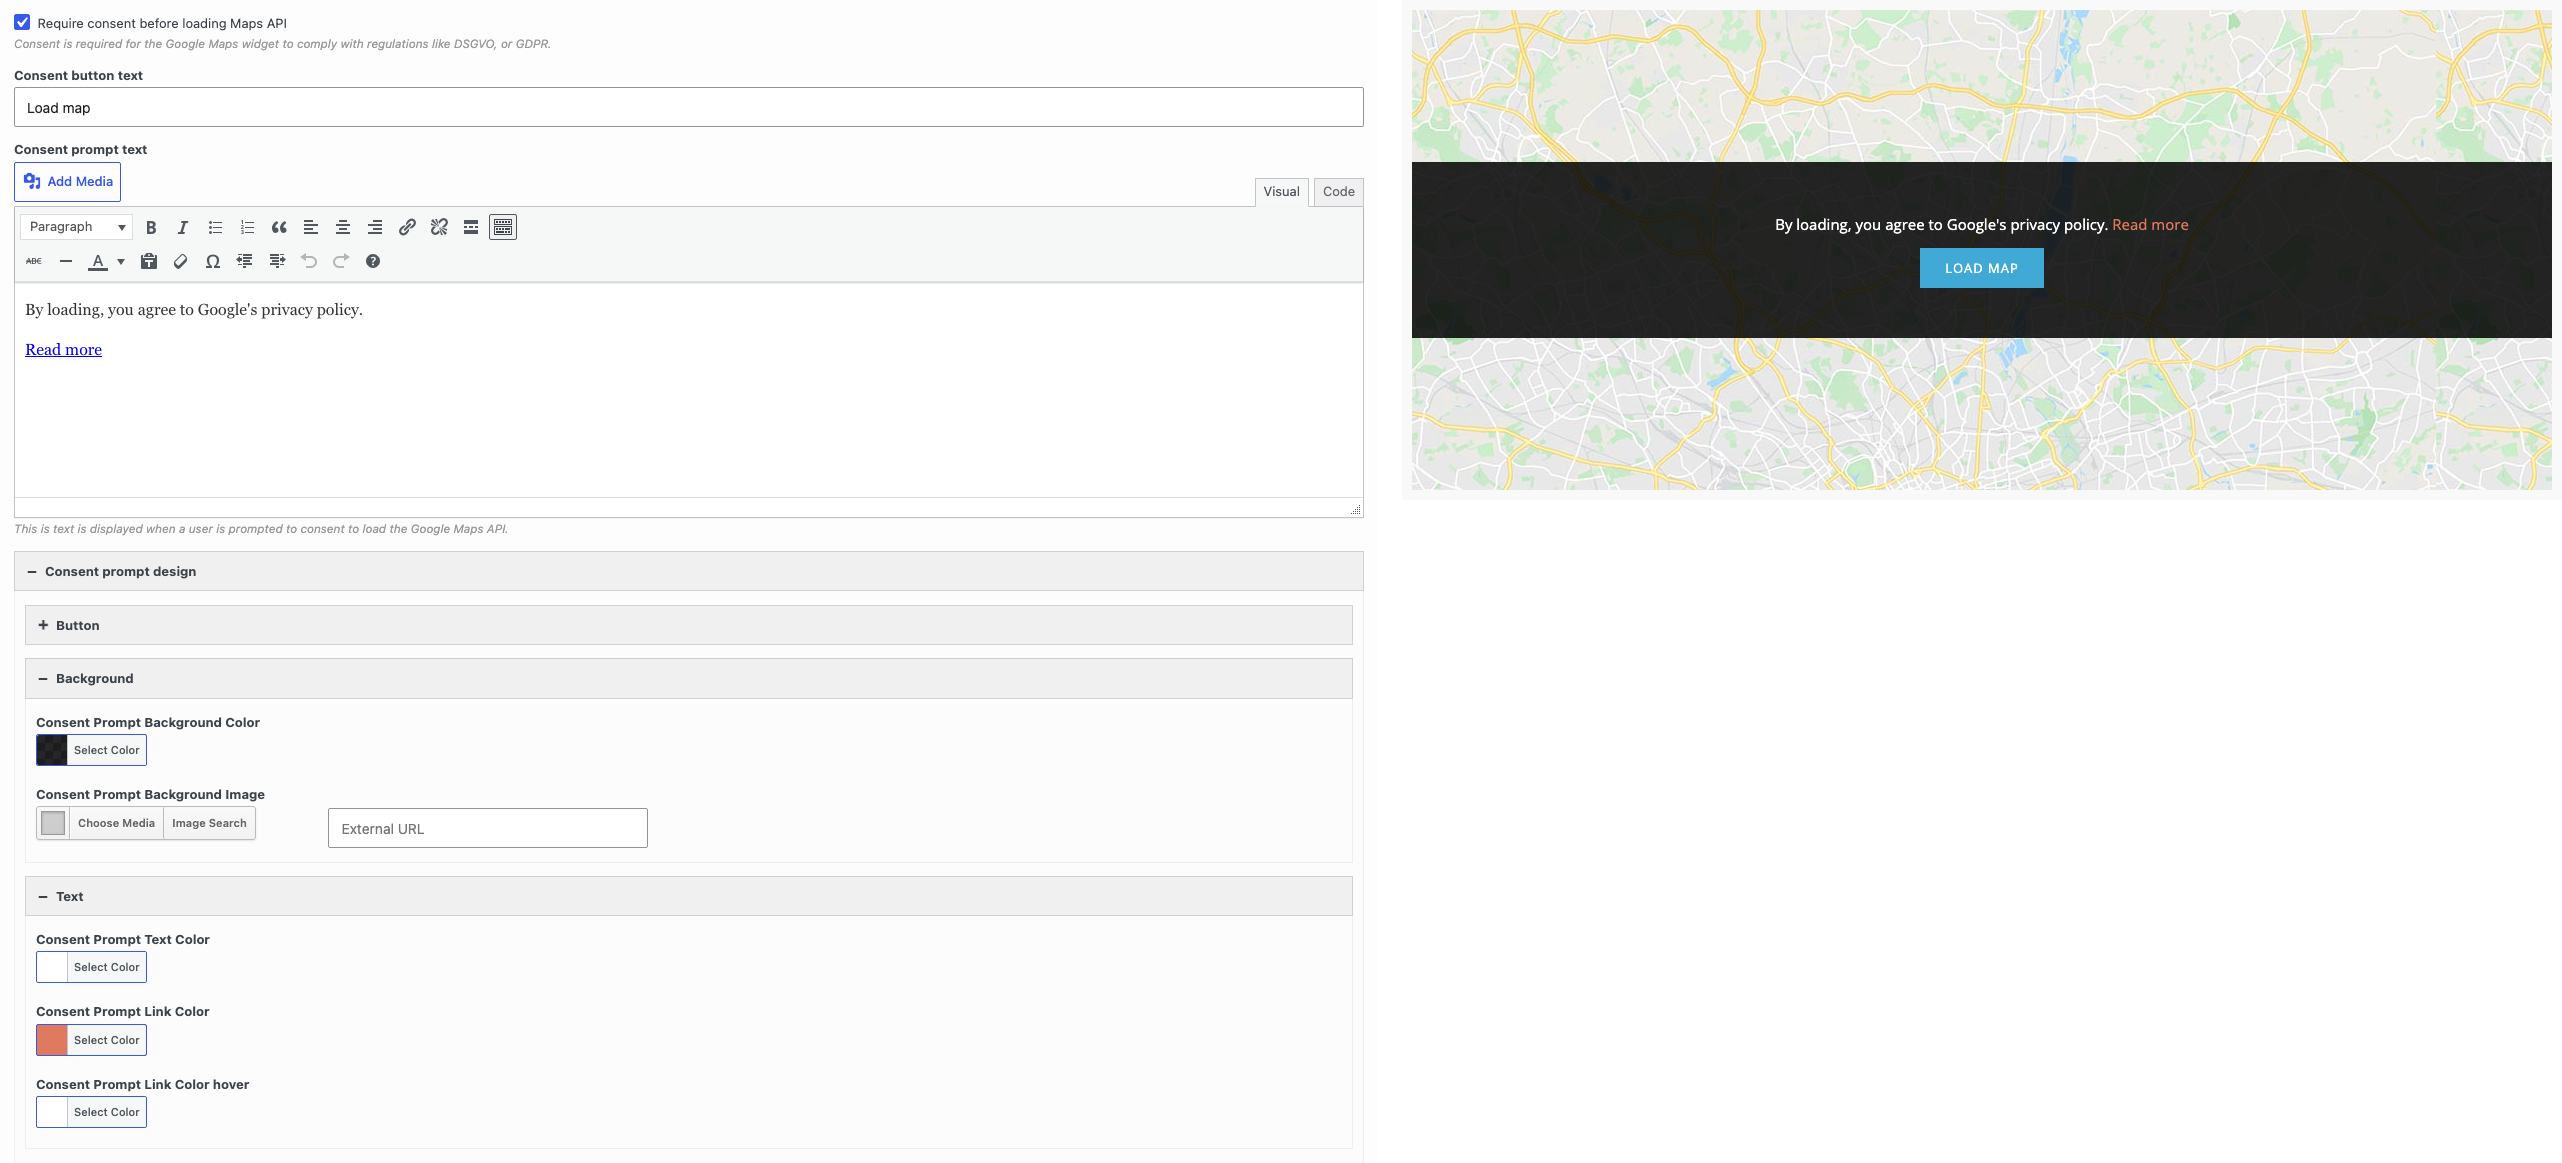
Require consent before loading Maps API: Show a prompt instead of the map. The map loads only after the visitor clicks the button. Use this to help comply with privacy laws such as the GDPR. Default: off.
Consent button text: The prompt button text. Default: Load map.
Consent prompt text: The prompt message. Default: “By loading, you agree to Google’s privacy policy.” with a Read more link to Google’s privacy policy.
Responsive breakpoint: At this screen width and below, Interactive maps use the Mobile zoom level, and Static image maps load a higher-resolution image. Default: 780px.
The consent prompt applies to Interactive maps. Static image maps load without it.
Consent Prompt Design
Open Consent prompt design and then Button to style the consent button.
Consent prompt button text color: Default: #fff.
Consent prompt button text hover color: Default: #eee.
Consent prompt button background color: Default: #41a9d5.
Consent prompt button background hover color: Default: #298fba.
SiteOrigin Premium adds two more sections to Consent prompt design:
- Background: Consent Prompt Background Image. You can pick the image from the Media Library or enter an external URL.
- Text: Consent Prompt Text Color (default: #fff), Consent Prompt Link Color (default: #41a9d5) and Consent Prompt Link Color hover (default: #298fba).
SiteOrigin Premium
Pick from 23 map styles or center the map on the visitor. SiteOrigin Premium adds these settings to the Google Maps Widget. Go to SiteOriginPremium Addons to activate the addons. Map Styles adds the styles, the visitor location option and the consent prompt design. Bulk Addresses adds bulk markers.
- Premium Styles: A new Map styles option. In the Premium styles field, pick one of 23 ready-made styles, such as Silver, Retro, Night or Aubergine. Default: Silver. If Styled map name is empty, the map uses the style name. See Map Styles.
- Center on user’s location: Center the map on the visitor’s location. The option also shows for Static image maps, but it works only on Interactive maps. The browser asks the visitor for permission first. If the visitor says no, the map uses the Map center. Requires HTTPS. See Map Styles.
- Bulk add addresses: A button in the Markers section, above Marker positions. Paste a list of addresses to create many markers at once. See Bulk Addresses.