
 Page Builder
  Widgets Bundle
  SiteOrigin CSS
  Installer
 Getting Started
4 min read Updated
The SiteOrigin Widgets Bundle is a free WordPress plugin. It adds a set of widgets that you can use to build your pages: buttons, sliders, hero images, maps, images, carousels, contact forms, features, icons and more.
Requirements
You can use the widgets in these places:
Page Builder: Add widgets in Page Builder by SiteOrigin, in the Classic Editor or in the SiteOrigin Layout block in the Block Editor.
Block Editor: Each widget is its own block, for example SiteOrigin Button. You find the blocks in the SiteOrigin block category.
Theme and Plugin Widget Areas: Add widgets to theme sidebars, footers and other widget areas, on the classic Widgets screen or the block-based Widgets screen.
Other Page Builders: Add widgets in Elementor or Beaver Builder.
The Widgets Bundle is also a framework. Theme and plugin developers can use it to build their own widgets. Read the developer documentation to find out more.
Install the Plugin
This video installs the Widgets Bundle, enables a widget and adds it to a page in Page Builder.
- Go to PluginsAdd Plugin.
- In the search field, type SiteOrigin Widgets Bundle.
- Click Install Now on the SiteOrigin Widgets Bundle.
- Click Activate.
Enable Widgets
The Widgets Bundle does not turn on all of its widgets. Enable each widget you want to use before you add it to a page.
New installs start with these widgets enabled: Button, Editor, Google Maps, Image, Image Slider and Post Carousel.
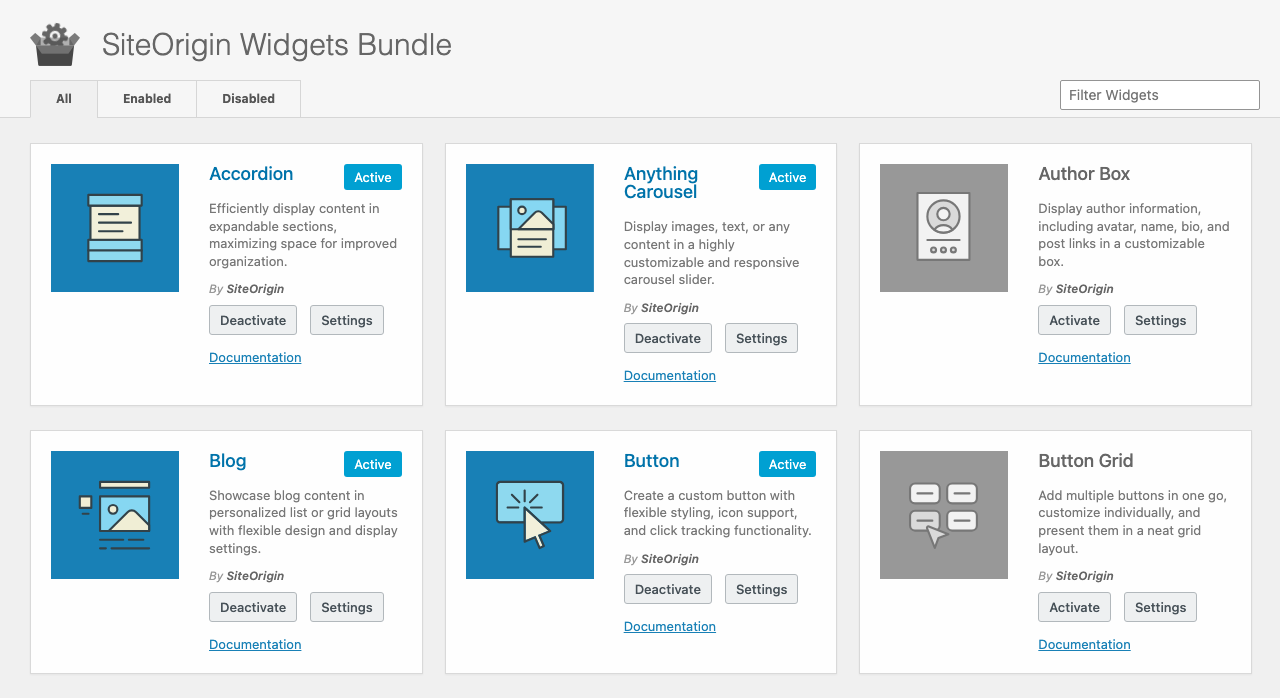
- Go to PluginsSiteOrigin Widgets.
- Find the widget. To find it faster, type its name in the Filter Widgets field at the top of the page.
- Click Activate on the widget card.
To disable a widget, click Deactivate on its card.
The tabs at the top of the page filter the list:
- All shows every widget.
- Enabled shows the widgets that are on.
- Disabled shows the widgets that are off.
Widget cards can also have these items:
- The Settings button opens the widget’s global settings. The card shows this button only when the widget has global settings.
- The Documentation link opens the documentation page for that widget.
If you open a Page Builder layout that uses a SiteOrigin widget that is disabled, Page Builder enables that widget for you.
Global Widget Settings
Global settings are site-wide. Some affect every copy of a widget. Others set the default for new copies. For example, the Google Maps Widget stores your Google Maps API key here, and many widgets have a Responsive Breakpoint for their mobile behavior.
- Go to PluginsSiteOrigin Widgets.
- Click Settings on the widget card.
- Change the settings in the Widget Settings dialog.
- Click Save.
For a list of every global setting, read Widget Global Settings.
Add a Widget to a Page
Page Builder
- Edit your page and open Page Builder.
- Click Add Widget.
- Find the widget in the SiteOrigin Widgets Bundle tab, or type its name in the search field.
- Click the widget to add it to your layout.
- Hover over the widget and click Edit to open its settings.
Read Building a Page to learn more about Page Builder.
Block Editor
Each enabled widget is its own block. The block name is usually the name on the widget’s card, with SiteOrigin in front. For example, the Hero Image widget is the SiteOrigin Hero Image block.
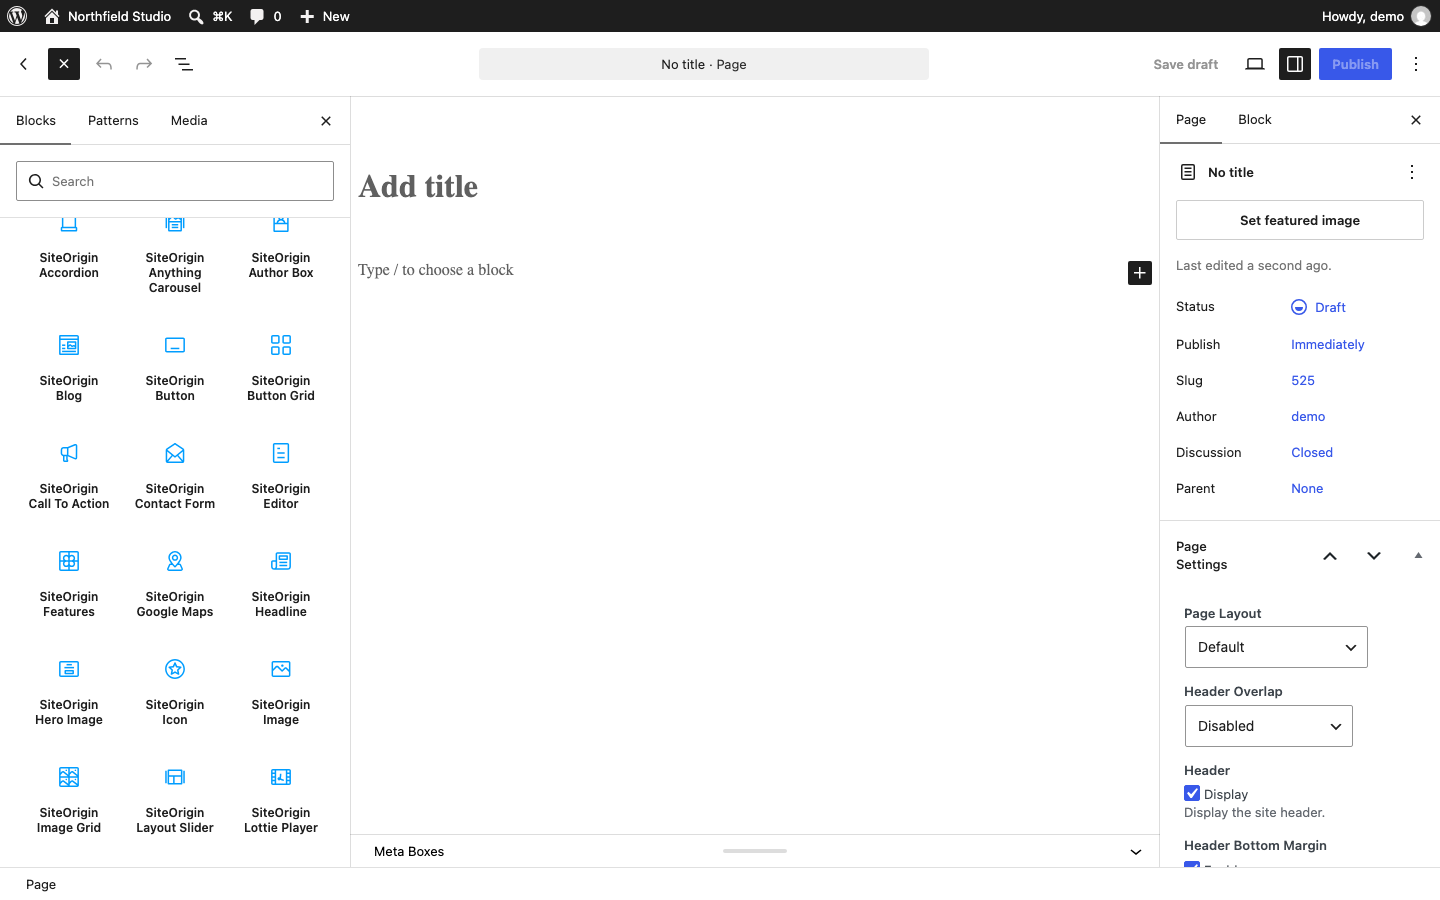
- Edit your page in the Block Editor.
- Open the block inserter.
- Scroll to the SiteOrigin category, or type the widget name in the search field.
- Click the block to add it.
- Fill in the widget form in the block.
- Click the Preview widget. button (the eye icon) in the block toolbar to see the result. Click Edit widget. (the pencil icon) to go back to the form.
Read Using Widgets in the Block Editor for the full guide.
Widget Areas
Go to AppearanceWidgets. On the block-based Widgets screen, add the widget blocks from the SiteOrigin category. On the classic Widgets screen, add the widget by its name, for example SiteOrigin Button.
SiteOrigin Premium adds new features to many widgets in the Widgets Bundle. Find out more about SiteOrigin Premium.