
 Page Builder
  Widgets Bundle
  SiteOrigin CSS
  Installer
 Menu Locations
2 min read Updated
A menu location is the place in the theme where a menu shows. North has one, Primary Menu, which shows your menu in the header. Nested menu items open as drop down sub menus.
Create and Assign a Menu
- Go to AppearanceMenus.
- Click create a new menu, type a name such as Main Menu and click Create Menu.
- On the left, open Pages, tick the pages you want and click Add to Menu. Drag an item to the right, under another item, to make it a sub item.
- Under Menu Settings, tick Primary Menu for Menu location.
- Click Save Menu.
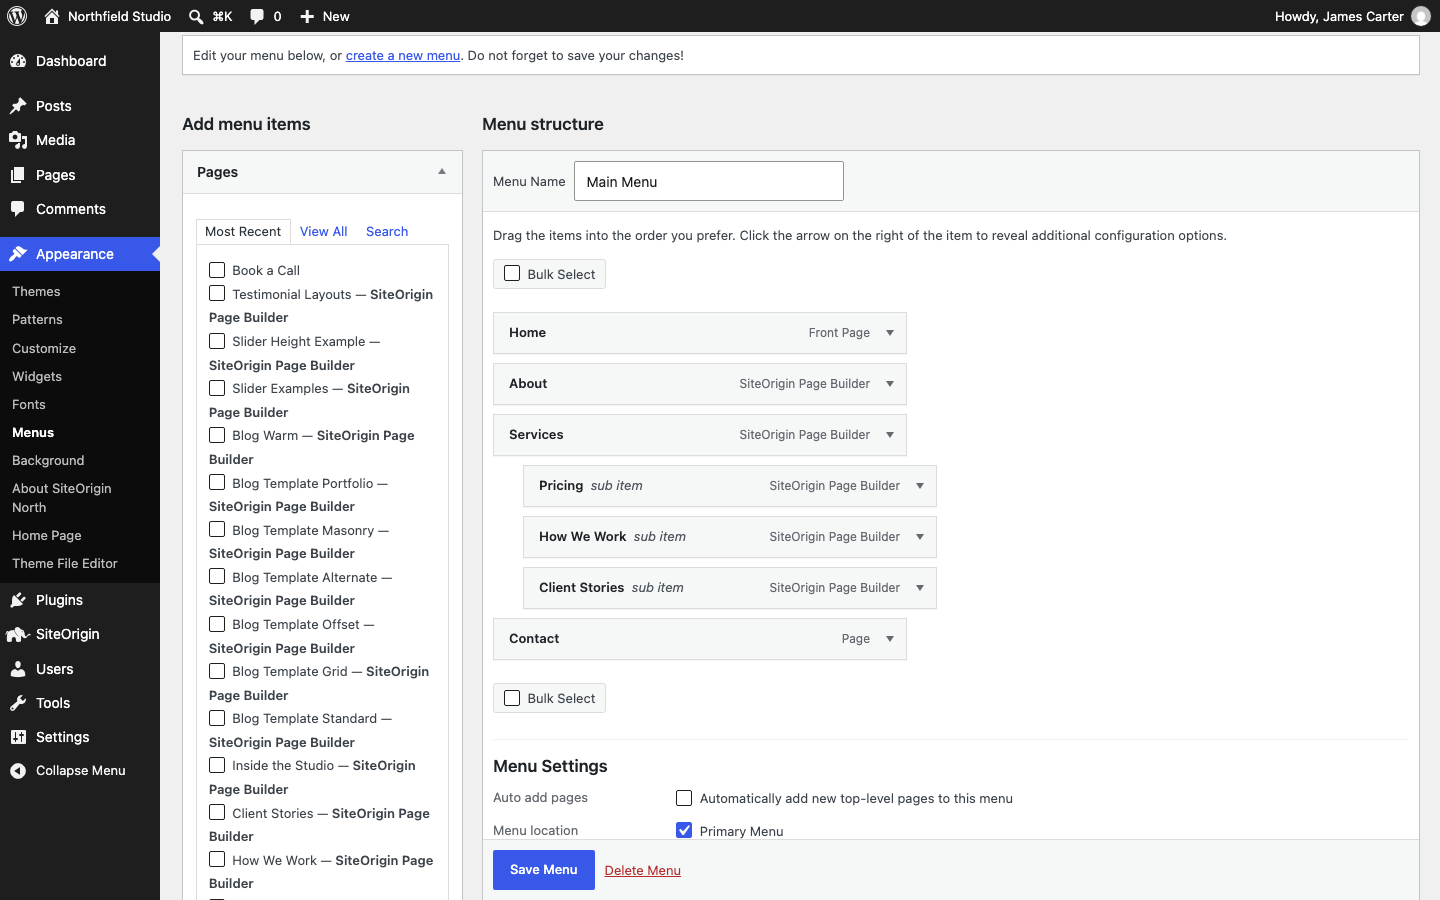
You can also assign a menu at AppearanceMenusManage Locations, or in the Customizer at AppearanceCustomizeMenus, where you see the changes in the preview before you publish.
Until you assign a menu to Primary Menu, North shows a list of your pages in the header.
Where the Menu Shows
- With the Default header layout, the menu is on the right of the logo. With the Centered layout, the logo is centered and the menu is centered below it. Set this with Header layout in Header.
- On screens 600px wide or narrower, the menu collapses into a mobile menu button with the text Menu. Change the width with Menu Breakpoint and the text with Mobile Menu Text in Responsive.
- A page set to the Stripped layout shows a Go back link instead of the menu. See Page Settings.
Menu Settings
The menu settings are in the Customizer at AppearanceCustomizeTheme SettingsNavigation. There you can turn off the search icon (Menu search) and the sticky header (Sticky menu). See Navigation.
Other sections change the menu too. Set the menu font and colors in Fonts, the mobile menu colors in Responsive, and your own mobile menu and search icons in Icons. When WooCommerce is active, the cart in the menu is in WooCommerce.
Mega Menus
North supports Max Mega Menu and UberMenu in the Primary Menu location. While either plugin is active, North does not add its search icon to the menu. See Integrated Plugins.