
 Page Builder
  Widgets Bundle
  SiteOrigin CSS
  Installer
 Getting Started
3 min read Updated
SiteOrigin CSS is a free CSS editor for WordPress. Write CSS in a code editor, or change colors, fonts, spacing and more with visual controls and a live preview of your site. Your CSS is saved in the WordPress database, so theme updates do not remove it and you do not need a child theme.
Requirements
- SiteOrigin CSS Plugin
- A user account that can edit theme options (the
edit_theme_optionscapability), for example an Administrator.
SiteOrigin CSS works with classic themes and block themes.
This video opens the editor, changes a heading in Visual Mode, saves the CSS and shows the result on the site.
Install the Plugin
- Go to PluginsAdd Plugin.
- In the search field, type SiteOrigin CSS.
- Click Install Now on SiteOrigin CSS.
- Click Activate.
Open the Editor
Go to AppearanceCustom CSS. You can also click CSS Editor under SiteOrigin CSS on the Plugins page.
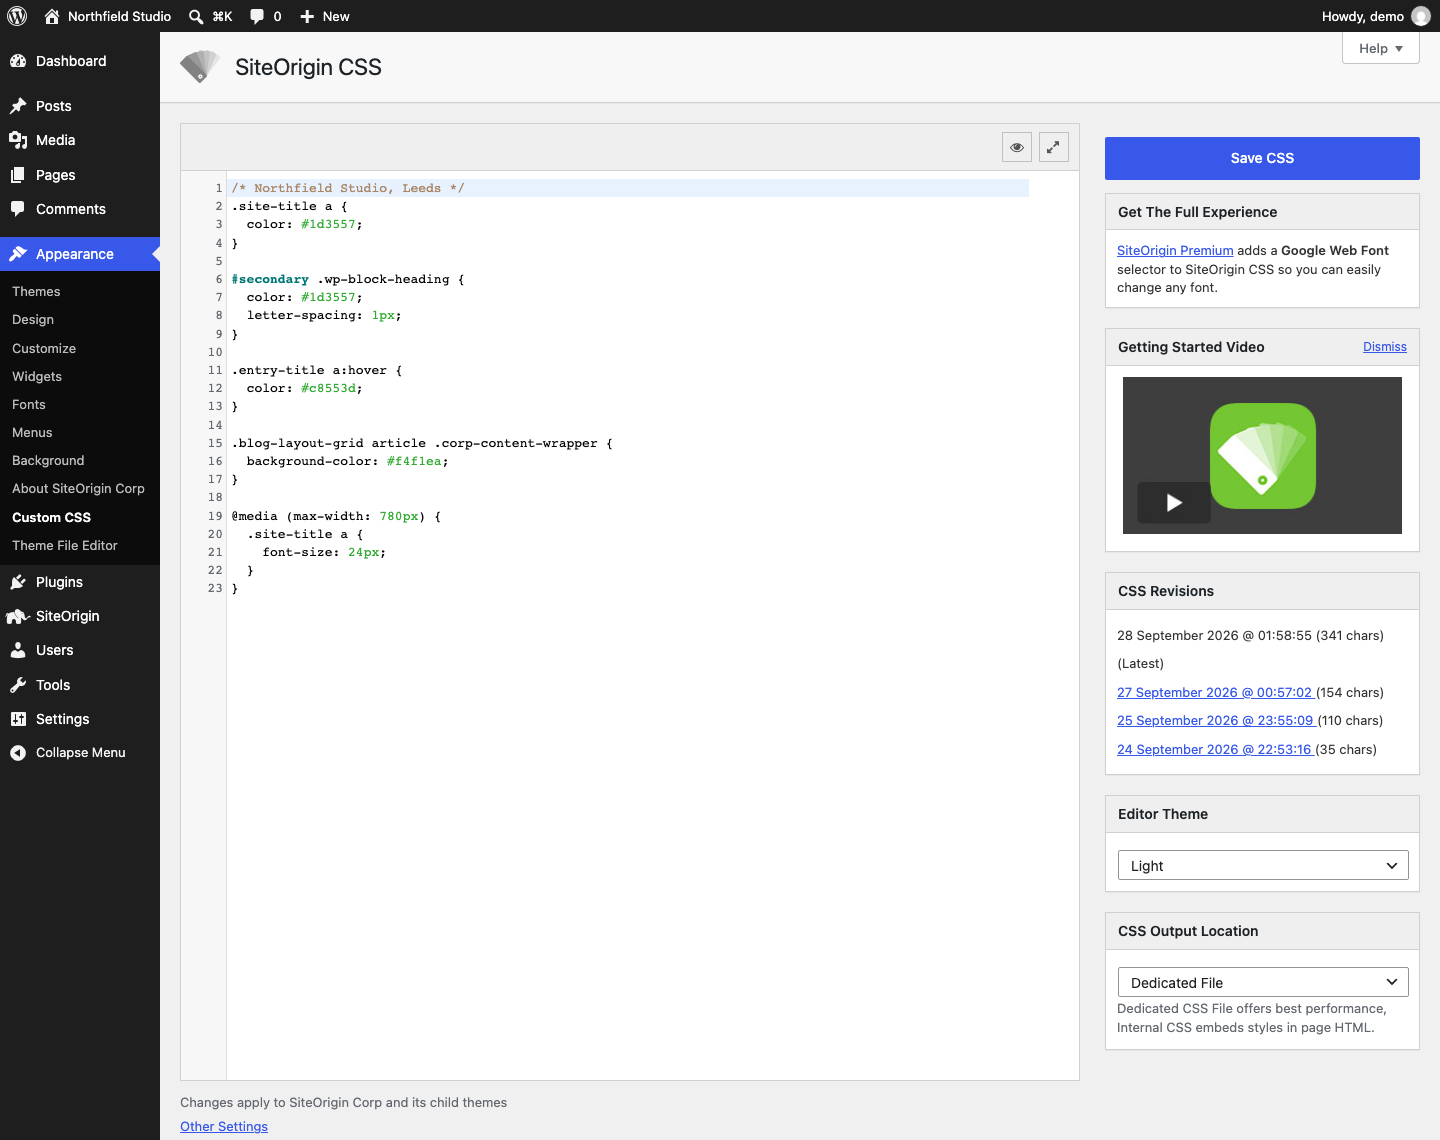
The editor has three modes:
- Basic editor: the screen that opens first. Write CSS in the code editor. The right column has the Save CSS button, your CSS revisions and the plugin settings. Read Basic Editor.
- Visual Mode: click the eye icon. Click an element in the live preview, then change it with controls on the Text, Decoration and Layout tabs. Read Visual Editor.
- Expanded Mode: click the arrows icon. Write CSS next to the live preview, and use the inspector to find the selectors for any element. Read Expanded Mode.
Make Your First Change
These steps change the color and size of a heading.
- Go to AppearanceCustom CSS.
- Click the eye icon (Open Visual Mode). Your home page opens in the preview.
- In the preview, click a heading, for example the Recent Posts title in the sidebar. The plugin adds a rule for the heading’s most specific selector. The selector shows in the dropdown at the top of the left panel.
- On the Text tab, click the Text Color field and pick a color.
- In Font Size, type a size, for example 20. The unit is px unless you pick another one.
- Click the check icon (Close) at the top of the panel. The editor now shows the CSS for your change.
- Click Save CSS.
Your change is live on the site as soon as you save. If you do not see it, clear your caching plugin or your browser cache.
What Happens to Your CSS
- Each theme has its own CSS. A parent theme and its child themes share one set. The text under the editor names the theme you are editing.
- Each save that changes the CSS adds a revision. The plugin keeps the 15 newest. You can load an older revision and save it again.
- By default, the plugin also writes your CSS to a file and links the file in the head of each page. You can print the CSS in the page instead. Read CSS Storage and Output.