
 Page Builder
  Widgets Bundle
  SiteOrigin CSS
  Installer
 Contact Form Emails Not Arriving? How to Fix It
If your contact form shows its success message but the email never reaches your inbox, the message was lost somewhere between your website and your mail provider. It’s a frustrating problem: the visitor thinks their message was sent, and you have no idea it exists. In this post, we’ll look at why contact form emails go missing and what you can do about it with the SiteOrigin Contact Form Widget.
Why Contact Form Emails Go Missing
When a visitor submits the Contact Form Widget, the widget hands the message to WordPress, and WordPress sends it as an email to the address in the widget’s To Email Address setting. Unless you’ve installed a mail plugin, WordPress sends that email through your web host’s basic mail function, which often isn’t set up to authenticate email for your domain in the way most mail providers now expect.
Gmail, Outlook and other providers check whether an email really comes from the domain it claims to come from. An unauthenticated email from a shared web server often fails that check, so it lands in spam or is rejected outright, and your website is never told. The From address matters too, because if an email claims to come from a Gmail or Outlook address but is sent from your web server, it’s very likely to be treated as spam.
Check Whether Your Form Is Sending
The first step is to find out where the message is being lost. If WordPress can’t send the email at all, the visitor sees “Error sending email, please try again later.” instead of your success message, which usually points to a problem with how your website sends mail.
If visitors see your success message but nothing arrives, WordPress handed the email over for sending, so it was lost somewhere after it left your website. Check your spam or junk folder first, then fill in the form yourself and see whether the notification arrives.
Set a From Address on Your Own Domain
Open the Contact Form Widget and expand the Settings section. The From Email Address is the address your notification emails appear to come from, and as the setting’s description says, it should be on the same domain as your website. If your site is yourdomain.com, use an address such as [email protected] rather than a Gmail or Outlook address.
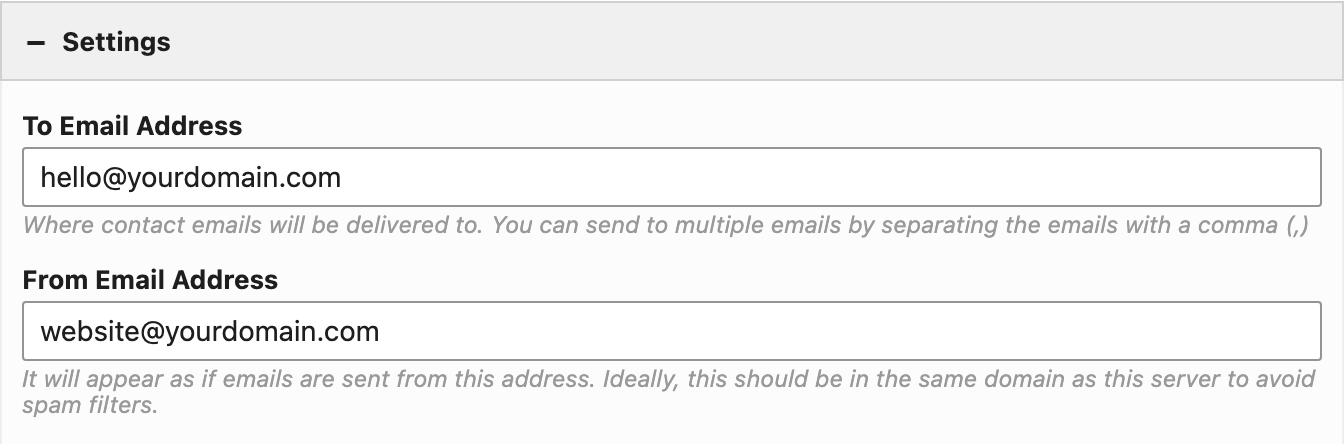
If you leave the field empty, or use the same address as the To Email Address, the widget sends from wordpress@ followed by your domain. Whichever address you use, as long as your form includes an email field, replies still go to the visitor, because the widget uses their address as the reply-to address. If you set up WP Mail SMTP as described below, its own From Email setting takes over from this one.
Send Through a Mail Service
A From address on your own domain helps, but the most reliable fix is to stop sending through your host’s mail function and send through a proper mail service instead. An SMTP plugin connects WordPress to that service, whether it’s the Google Workspace or Gmail account you already use or a sending service such as Brevo, Mailgun or SendGrid. We use WP Mail SMTP here on SiteOrigin.com; it’s free on WordPress.org, and the free version supports all of those services.
Whichever service you choose, it will give you DNS records to add to your domain, usually SPF and DKIM. These records tell other mail servers that the service is allowed to send email for your domain, and they’re one of the main things Gmail, Outlook and others check before deciding whether to trust an email.
Set Up Brevo’s Free Plan with WP Mail SMTP
If you don’t already have a mail service, Brevo’s free plan is a good place to start. It lets you send up to 300 emails a day, far more than most contact forms need, and you don’t need a credit card to sign up. Start in Brevo:
- Create a free account at Brevo.
- Authenticate your domain. In Brevo, open the profile menu at the top right, go to Settings > Senders, domains, IPs, open the Domains tab and click Add domains. Brevo gives you a Brevo code TXT record and a DKIM record to add at your domain registrar or DNS host, along with a DMARC record it recommends adding too. DNS changes can take a while to take effect.
- Create an API key. In Brevo’s Settings, go to SMTP & API, open the API keys & MCP tab and generate a new key. Copy it straight away; Brevo only shows it once.
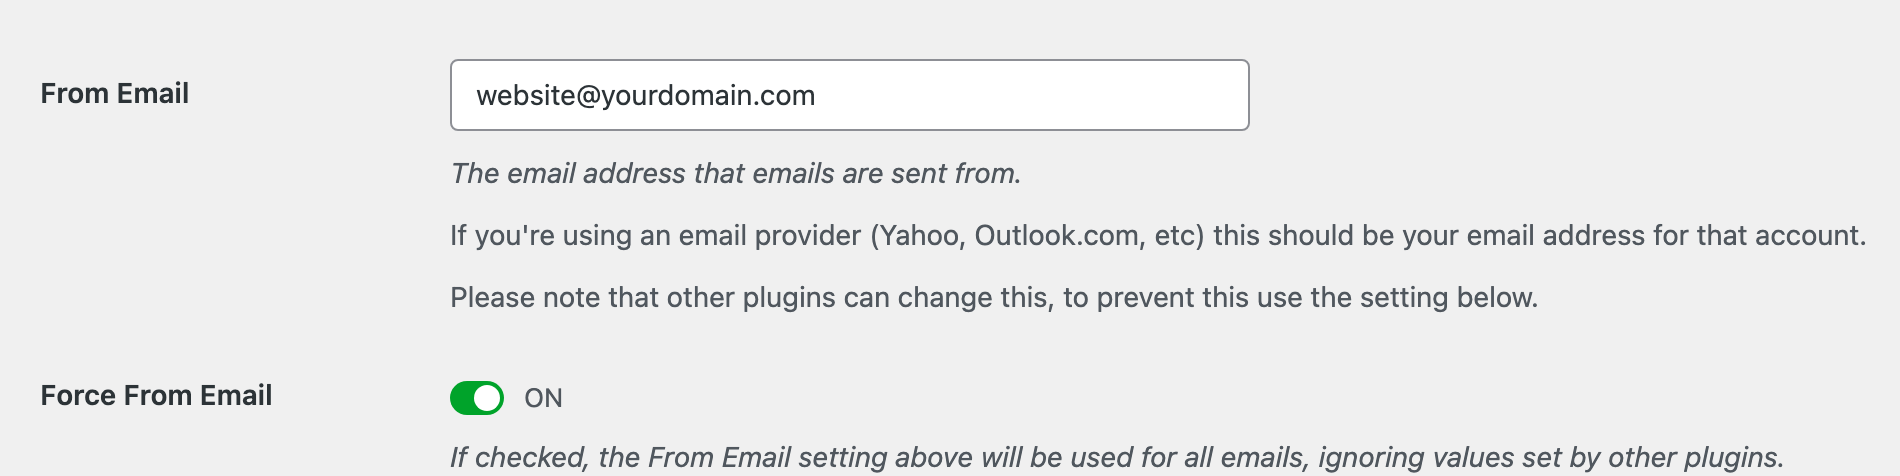
Back on your site, go to PluginsAdd Plugin, search for WP Mail SMTP, install and activate it, and go to WP Mail SMTPSettings. Set the From Email to an address on the domain you authenticated in Brevo, and leave Force From Email on. With Force From Email on, every email WordPress sends, including your contact form notifications, uses this address in place of the From Email Address set in the Contact Form Widget.
Under Mailer, choose Brevo.

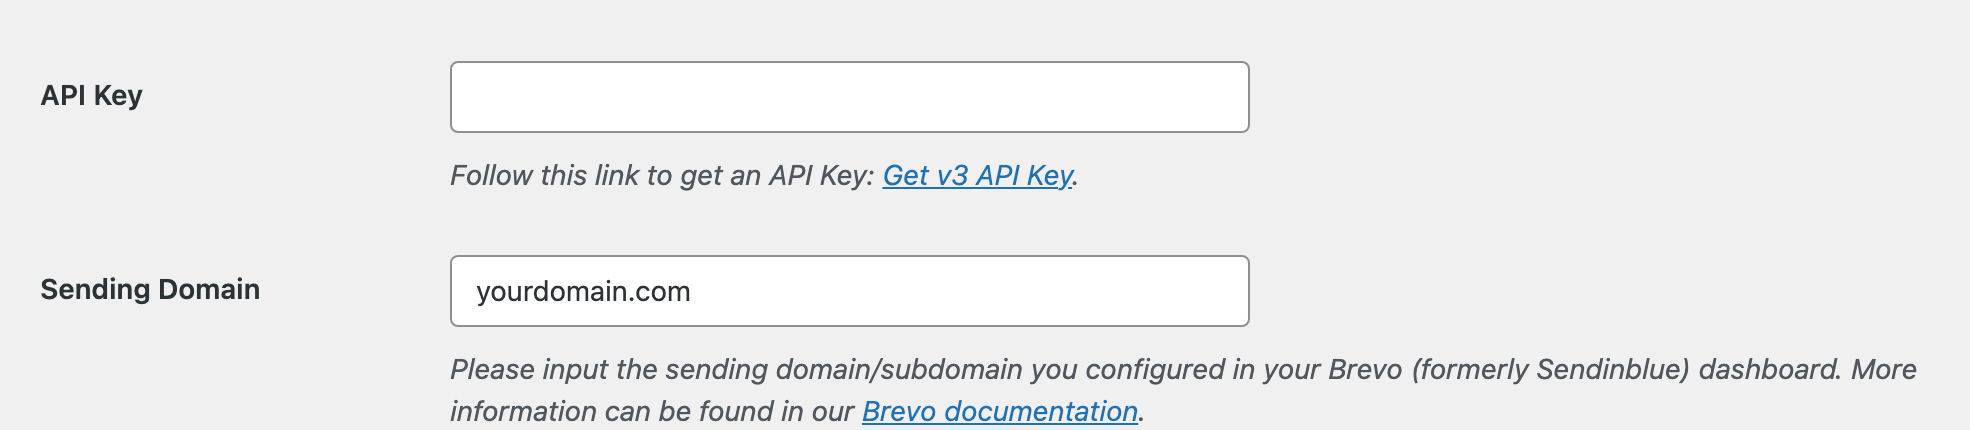
Paste your Brevo key into the API Key field, enter your domain in Sending Domain and click Save Settings. If you’d rather be guided through the setup, the plugin also has a Launch Setup Wizard button at the top of the settings.
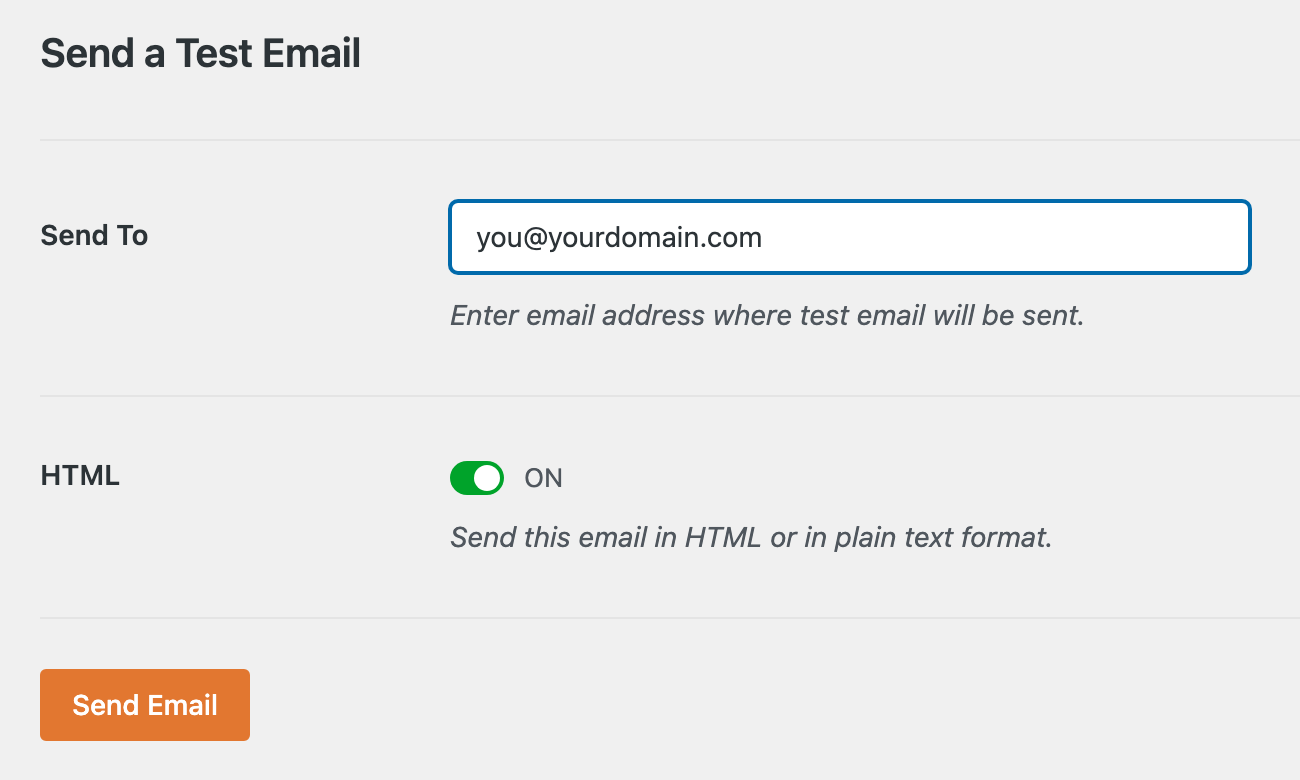
Finally, go to WP Mail SMTPTools, open the Email Test tab, enter your own email address and click Send Email. Once the test arrives, submit your contact form to confirm the notification arrives too. For more detail on each setting, see the WP Mail SMTP guide to the Brevo mailer.
Keep a Copy of Your Messages
Even with a mail service in place, an email can still be deleted by mistake or caught by a strict filter. The Contact Log Addon in SiteOrigin Premium keeps a copy of every message the Contact Form Widget sends successfully, right in your WordPress dashboard. If an email goes missing after it leaves your website, you’ll find the message under SiteOriginContact Log, where you can search it by name, email address or a phrase from the message.
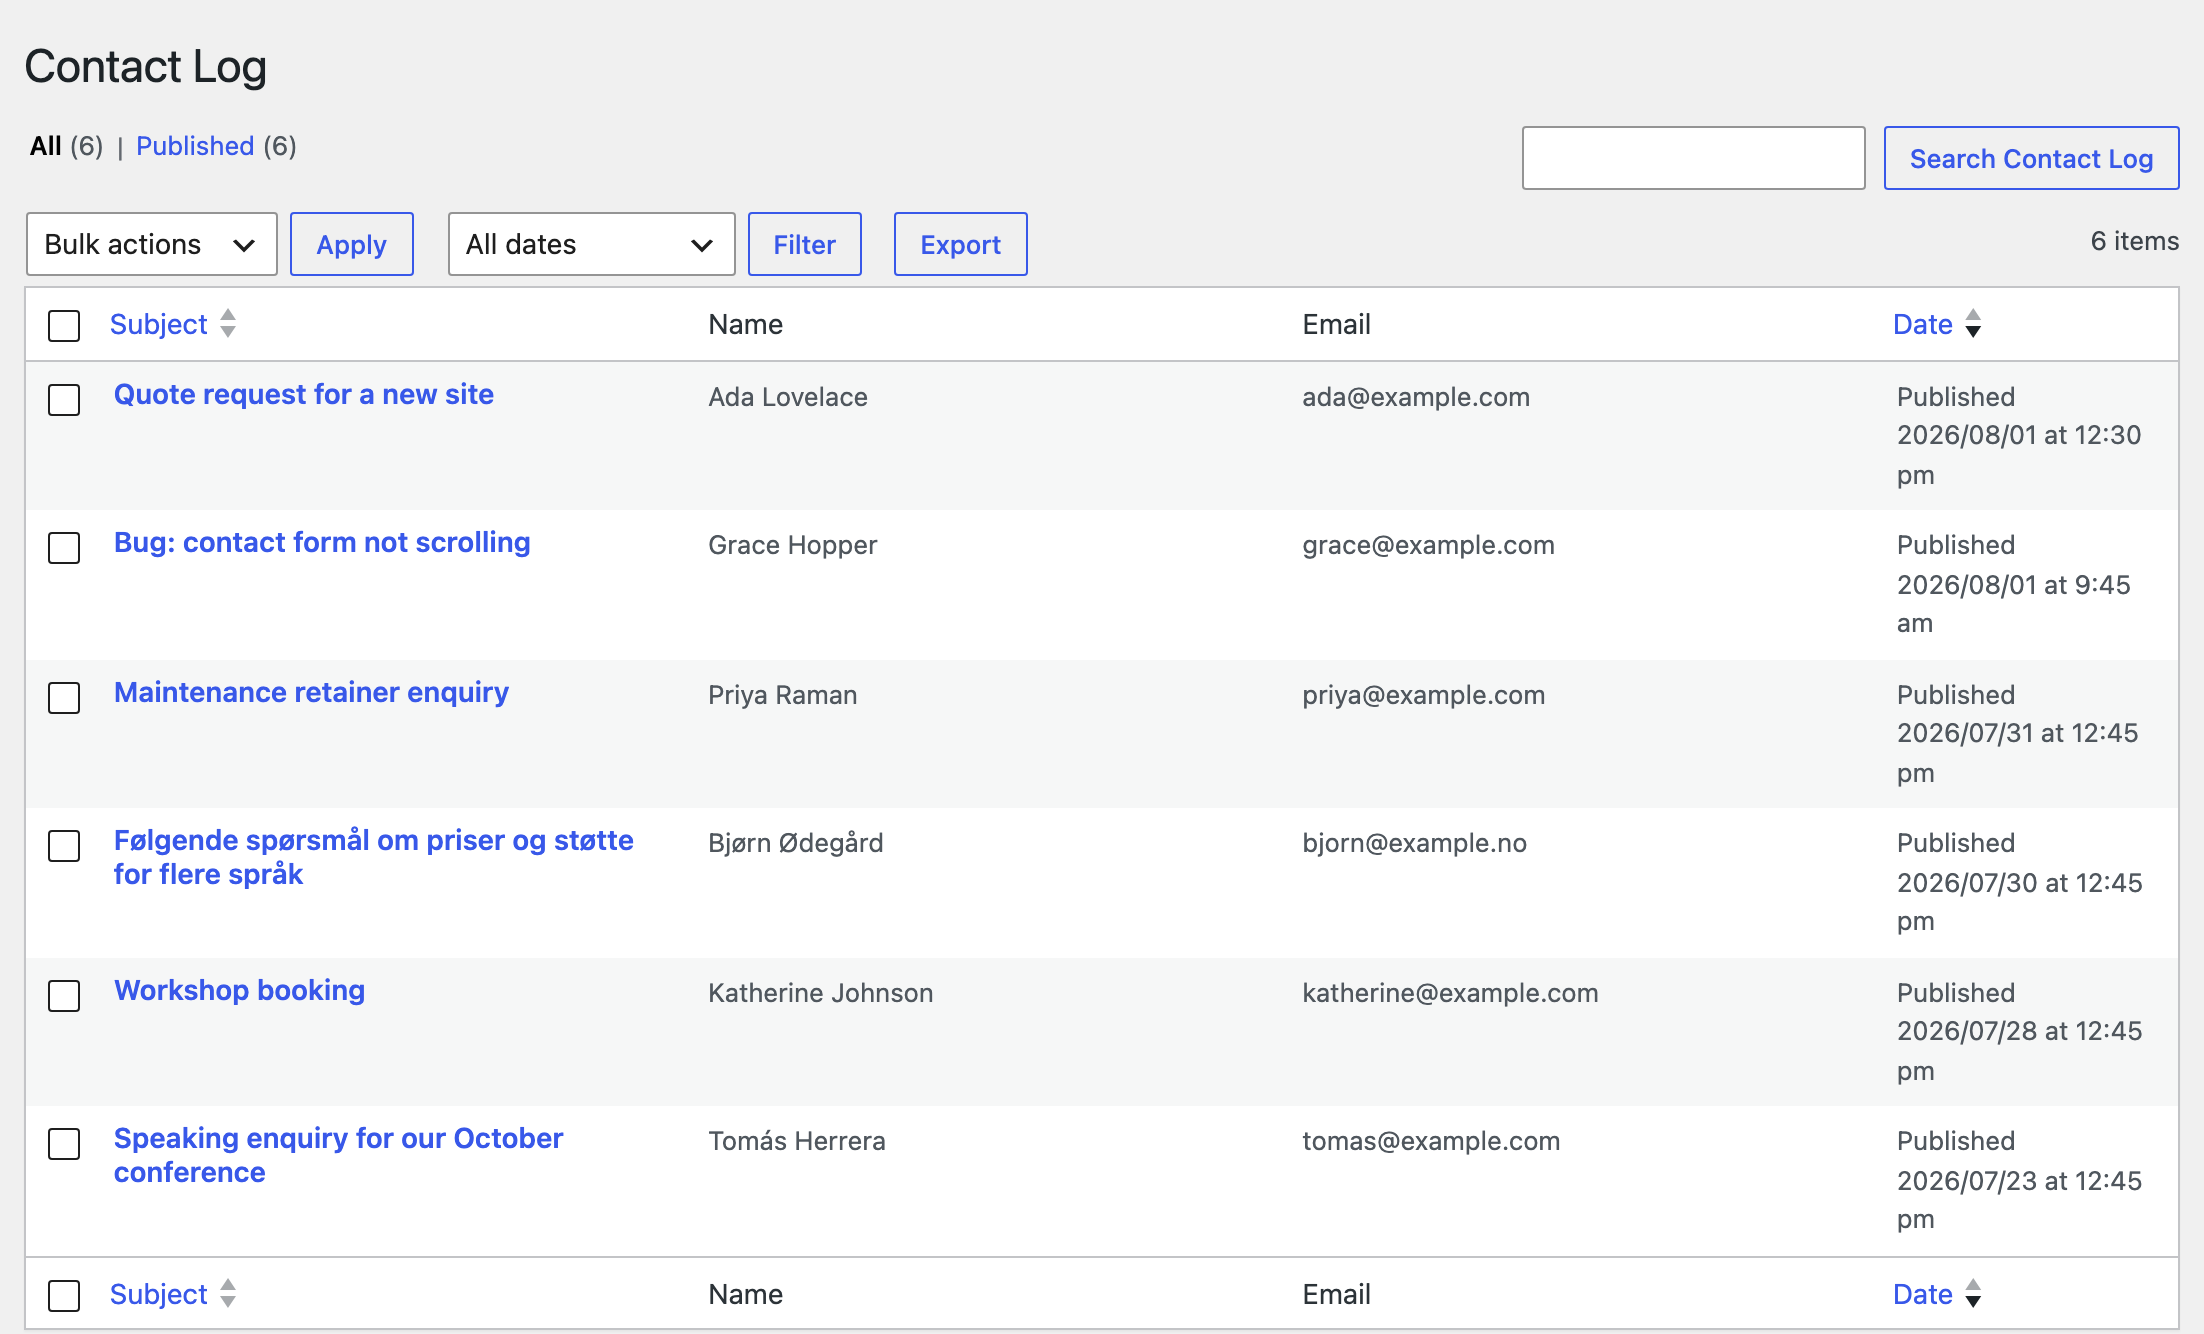
The log only records messages that WordPress sent successfully. If sending fails outright, there’s no entry, but the visitor sees the error message and knows to try again or contact you another way.
For more on the widget’s settings, see the Contact Form Widget documentation and the Contact Log documentation.
Thanks for reading. If you have any questions or feedback, please let us know in the comments below.