To make setting up a new site quick and easy, we created the SiteOrigin installer plugin. This plugin gives you quick access to some essential themes and plugins in just a few clicks.
Installing SiteOrigin Installer
To start, download the latest copy of the SiteOrigin Installer plugin. The file you download is a standard ZIP file called siteorigin-installer-master.zip. If instead of a ZIP file, you get a folder named siteorigin-installer-master, you might need to disable auto unzip in Safari.
Once you have this file, navigate to Plugins > Add New. If you can’t see this page then it’s possible your WordPress account doesn’t have the access rights to install plugins. You’ll need to get hold of the person who manages your website and have them install everything for you.
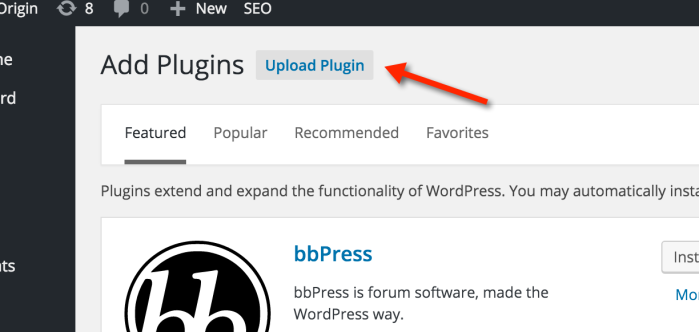
From there, click on the upload plugin in the header.

Then choose the ZIP file you just downloaded and upload the plugin by clicking Install Now.
Installing Plugins
After you’ve installed the SiteOrigin installer plugin, you’ll see a new section in your WordPress sidebar called simply SiteOrigin. Under there, you get a few options. For now, we’re interested in installing plugins so we’ll go to Install Plugins.
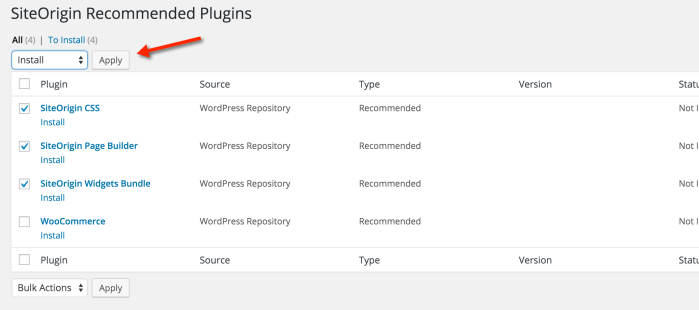
On this page you can either install/activate plugins one by one, or select all the plugins you want to install, then choose the install bulk action.

Installing a Theme
Once you have all the plugins you need to create a new site, it’s time to choose a WordPress theme that suits your needs. For that, we’ll navigate to SiteOrigin > Install Themes in your WordPress admin. Under there, you’ll see a list of themes that you can try. Click Demo to see a preview of the theme, then click Install to download and install the theme.